Developer Manual: Difference between revisions
| Line 44: | Line 44: | ||
Resources: | Resources: | ||
SDRAM: | |||
<!--* [ JEDEC SDRAM Standard] TODO --> | |||
* [http://www.intel.com/design/chipsets/memory/spdsd12a.pdf Intel SPD Standard] | |||
<!--* [ JEDEC SPD Standard] TODO --> | |||
* [http://download.micron.com/pdf/datasheets/dram/sdram/512MbSDRAM.pdf Micron 512 MB SDRAM Datasheet] (PDF) -- contains some helpful explanations | |||
DDR SDRAM: | |||
<!--* [ JEDEC DDR Standard] (PDF) Explains the RAM initialization process TODO--> | |||
* [http://www.jedec.org/download/search/4_01_02_04R13.PDF JEDEC DDR SPD Standard] (PDF) | |||
* [http://www.simmtester.com/page/news/showpubnews.asp?num=101 Understanding DDR Serial Presence Detect (SPD) Table] | * [http://www.simmtester.com/page/news/showpubnews.asp?num=101 Understanding DDR Serial Presence Detect (SPD) Table] | ||
* [http://download.micron.com/pdf/datasheets/ | * [http://download.micron.com/pdf/datasheets/modules/ddr/DDA9C16_32_64x72AG.pdf Micron DDR400 Datasheet] | ||
DDR2 SDRAM | |||
* [http://www.jedec.org/download/search/JESD79-2C.pdf JEDEC DDR2 Standard] (PDF) | |||
* [http://www.jedec.org/download/search/4_01_02_04R13.PDF JEDEC DDR2 SPD Standard] (PDF) | |||
* [http://www.simmtester.com/PAGE/news/showpubnews.asp?where=373939&num=139 DDR2 DIMM SPD Definition] | |||
<!-- TODO: Add datasheet links (Micron ones are very good) --> | |||
DDR3 SDRAM | |||
<!-- Need to find these | |||
* [ JEDEC DDR3 Standard] (PDF) | |||
* [ JEDEC DDR3 SPD Standard] (PDF)--> | |||
* [http://www.simmtester.com/PAGE/news/showpubnews.asp?num=153 Understanding DDR3 Serial Presence Detect (SPD) Table] | |||
== Southbridge == | == Southbridge == | ||
Revision as of 21:45, 27 November 2007
Introduction
This manual is intended for aspiring LinuxBIOS developers to help them get up to speed with the code base and the tasks required to add support for new chipsets, devices, and mainboards. It currently covers LinuxBIOSv2, but will be extended to also cover the development version LinuxBIOSv3 later.
Hardware Overview
LinuxBIOS Overview
Serial output and the Super I/O
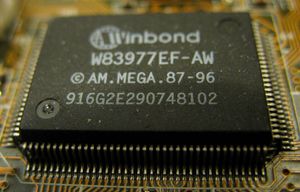
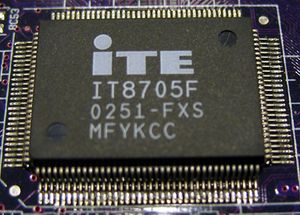
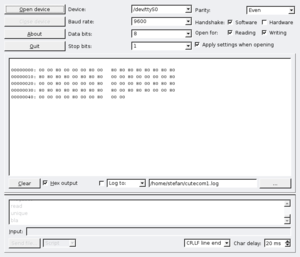
The Super I/O is a chip found on most of today's mainboards which is — among other things — responsible for the serial ports of the mainboard (e.g. COM1, COM2). This chip is usually the first thing you'll want to support, as it's required to get serial debugging output from the mainboard (via a null-modem cable and the proper software, e.g. minicom or CuteCom).


The steps for adding support for a new Super I/O chip are:
- Add a directory src/superio/vendor/device (e.g. src/superio/winbond/w83627ehg).
- In that directory, add a file device_early_serial.c (e.g. w83627ehg_early_serial.c). This file will be responsible to setup a serial port on the mainboard so that you can get serial debugging output. This will work even before the RAM is initialized, thus is useful/required for debugging the RAM initialization process.
- In this file you now declare a function device_enable_serial() which enables the requested serial port. Example:
 static void w83627ehg_enable_serial(device_t dev, unsigned int iobase)
 {
        pnp_enter_ext_func_mode(dev);
        pnp_set_logical_device(dev);
        pnp_set_enable(dev, 0);
        pnp_set_iobase(dev, PNP_IDX_IO0, iobase);
        pnp_set_enable(dev, 1);
        pnp_exit_ext_func_mode(dev);
 }
- Mainboards which have this Super I/O chip, will call this function in their auto.c or cache_as_ram_auto.c file. Example:
 #include "superio/winbond/w83627ehg/w83627ehg_early_serial.c"
 [...]
 #define SERIAL_DEV PNP_DEV(0x2e, W83627EHG_SP1)
 [...]
 w83627ehg_enable_dev(SERIAL_DEV, TTYS0_BASE);
 uart_init();
 console_init();
- Whether the Super I/O is at config address 0x2e (the usual case) or 0x4e (or some other address) is mainboard-dependent. You can find out the address by running superiotool.
Northbridge
RAM init
Resources: SDRAM:
- Intel SPD Standard
- Micron 512 MB SDRAM Datasheet (PDF) -- contains some helpful explanations
DDR SDRAM:
- JEDEC DDR SPD Standard (PDF)
- Understanding DDR Serial Presence Detect (SPD) Table
- Micron DDR400 Datasheet
DDR2 SDRAM
DDR3 SDRAM
Southbridge
Mainboard
IRQ Table
Creating a new Target
To create a new mainboard target you have to add several files.
- Multiple files in src/mainboard/vendorname/mainboardname (replace vendorname and mainboardname, of course).
- A file targets/vendorname/mainboardname/Config.lb which specifies a few target-specific config options, e.g. the ROM chip size, the payload, etc.
Miscellaneous Tips
minicom
Minicom is not just a serial terminal. It was written long before the internet existed and electronic communication was only possible with a modem to a mailbox-computer. Minicom is written with the ncurses library and provides its magic via a text interface. Other than logging, it provides z-modem up- and download-capability.
CuteCom
This is an easy to use serial-terminal-program which is even able to write all communication into a log-file. It needs a computer with installed Qt-libs.


|
This work is free software; you can redistribute it and/or modify it under the terms of the GNU General Public License as published by the Free Software Foundation; either version 2 of the License, or any later version. This work is distributed in the hope that it will be useful, but WITHOUT ANY WARRANTY; without even the implied warranty of MERCHANTABILITY or FITNESS FOR A PARTICULAR PURPOSE. See the GNU General Public License for more details. |